I suppose I have my father to thank for my picture wall.
Growing up, he covered the entire three-storey staircase of our family home in vintage enamel posters. Rising some 30 feet, the whole space was covered in posters, and as a child I found this soaring edifice of images completely normal.
It wasn't until adulthood that it occurred to me I had been extremely lucky growing up surrounded by such a lavish, wanton celebration of imagery.
Fast-forward to the present day, and my best friend has covered the staircase of her London home in paintings and photos in what she has dubbed an 'homage' to my father and now, in turn, I have decked the walls of my Dubai home in pictures as an homage to my best friend.
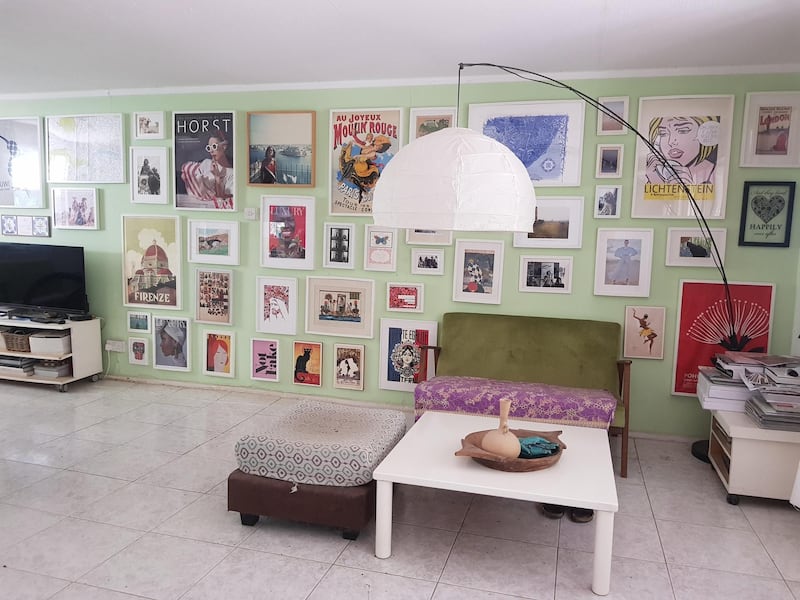
I regularly add to it and swap things out as I tire of looking at them. There are posters from exhibitions, family photos, a map of London, magazine covers and strange bits of artwork I have collected on my travels.
I have framed tea towels, silk handkerchiefs and even raffia textiles: that I have to occasionally tug these back straight in their frames is part of their charm. In fact, having this colourful, cheerfully shambolic wall in my house is so normal that only when work colleagues started commenting over Zoom work meetings did it strike me as something that's absent in most homes.
I have created my own picture wall by eye, merrily bashing nails into the walls until I get the spacing right, happy to fix the wall with some plaster and a little paint. For those who prefer to avoid the mess, here is a simple guide to creating a fuss-free picture wall ...
Safety first
Before you or anyone else starts nailing things into the wall, it is extremely important that you identify where the live electricity wires are. Look for light switches and wall plugs and mentally run a vertical line through that point, floor to ceiling.
Do not go within a minimum of 20 centimetres on either side of that line. If in doubt, hire a reputable handyman to hang the frames for you.
Decide which wall to use
I opted to put mine in the living room, to fill a long wall and create a natural focal point, but this works equally well in children’s rooms, in hallways (to add interest to an otherwise underused space) or in bedrooms.
Is it going against a plain wall, one that has been painted, or against wallpaper? The last option can look very interesting, but is it tricky to stop it from appearing cluttered.
Decide what you want the finished result to look like
Having a clear idea of the end result will help with placement. Should it fill a rectangular shape above a piece of furniture or extend from ceiling to floor?
Will it go up the staircase? Do you want to emphasise the stepped shape created by the frames? Is there a lot of furniture in the room already?
If so, having lots of images on the wall will make the room feel very crowded. Sketch out your ideas first and remember there is no ‘wrong’ answer.
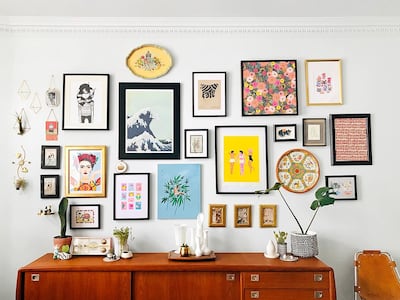
Choose the layout and get creative
This is the really fun bit, deciding which image will go where. Put all the images in the chosen frames and then start by laying them out on the floor, making sure the gaps between them are the same. If you cannot gauge it by eye (and the human eye is accurate to 0.03mm) use the space of two or even three fingers between each frame.
Feel free to mix things up, such as using favourite postcards or images torn from magazines mixed up with family photos. This is a personal wall, so do not feel intimidated that it has to look a certain way. The best photo walls are usual slightly off kilter and very individual. Make it the story of your family life and have fun with it.
Children's drawings, tickets for outings, and the odd bits and pieces we all amass are wonderful mementos of life, so why not frame them and put them on the wall? Have a favourite T-shirt? Frame it. Buy a box frame and put in the baby’s old hat or first pair of booties, or even dried flowers.
There is no wrong answer. I used to have a beautiful piece of wallpaper in a frame. The best thing about these walls is that the things in each frame can be changed whenever you want.
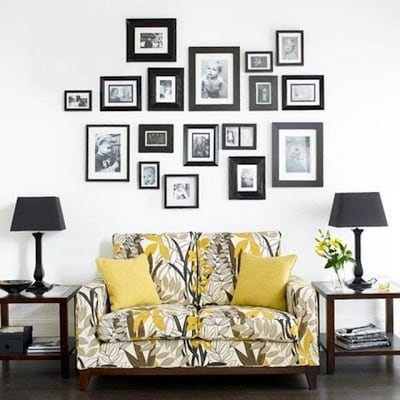
Select the frames
An easy way to create visual harmony is to use the same coloured frame throughout. Knowing I would have wide range of colours in my images, I picked cheap white frames from Ikea to help unify the end result.
Some people prefer to use different but complementary frames, or they go for an eclectic mix of styles. This can be very successful if using vintage frames. This is a personal choice, so follow your instincts.
Get the right equipment
You will need a spirit level (to make sure the frames hang straight) a hammer, some nails, or screws and a screwdriver, a pencil and a tape measure.
Once you have finalised the placement by laying the frames on the floor, take photographs of the arrangement for reference.
Then, if you want, you can cut bits of newspaper to the size of each frame, and tape them to the wall in the same shape to double check you are happy with the overall effect. If you are hiring a handyman to hang the pictures for you, this technique will help speed the process along, as he or she will have a blueprint to work from.
Use your photographs as reference as much as you need to make sure it's right. If you are hanging the pictures yourself, take it one frame at a time and build outwards. If you have already sorted out the order and the spacing, just follow your layout that is (hopefully) still on the floor.

Finally, there are lots of tutorial videos out there, so watch a few until you feel confident enough to have a go yourself.
What if the result doesn't look right?
Some will offer give quite rigid ideas of what does and doesn’t work, but do not get too hung up on this. As long as the frames physically fit into the required space, and the wall isn’t fighting for attention against lots of furniture, it will look good.
If it does end up looking too crowded, and you cannot face taking it all off and starting again, make sure the walls around it are empty of pictures, and take away one piece of furniture, to give the images space to be seen.
Then stand back and admire your handiwork and wait for the compliments to roll in over Zoom meetings.